
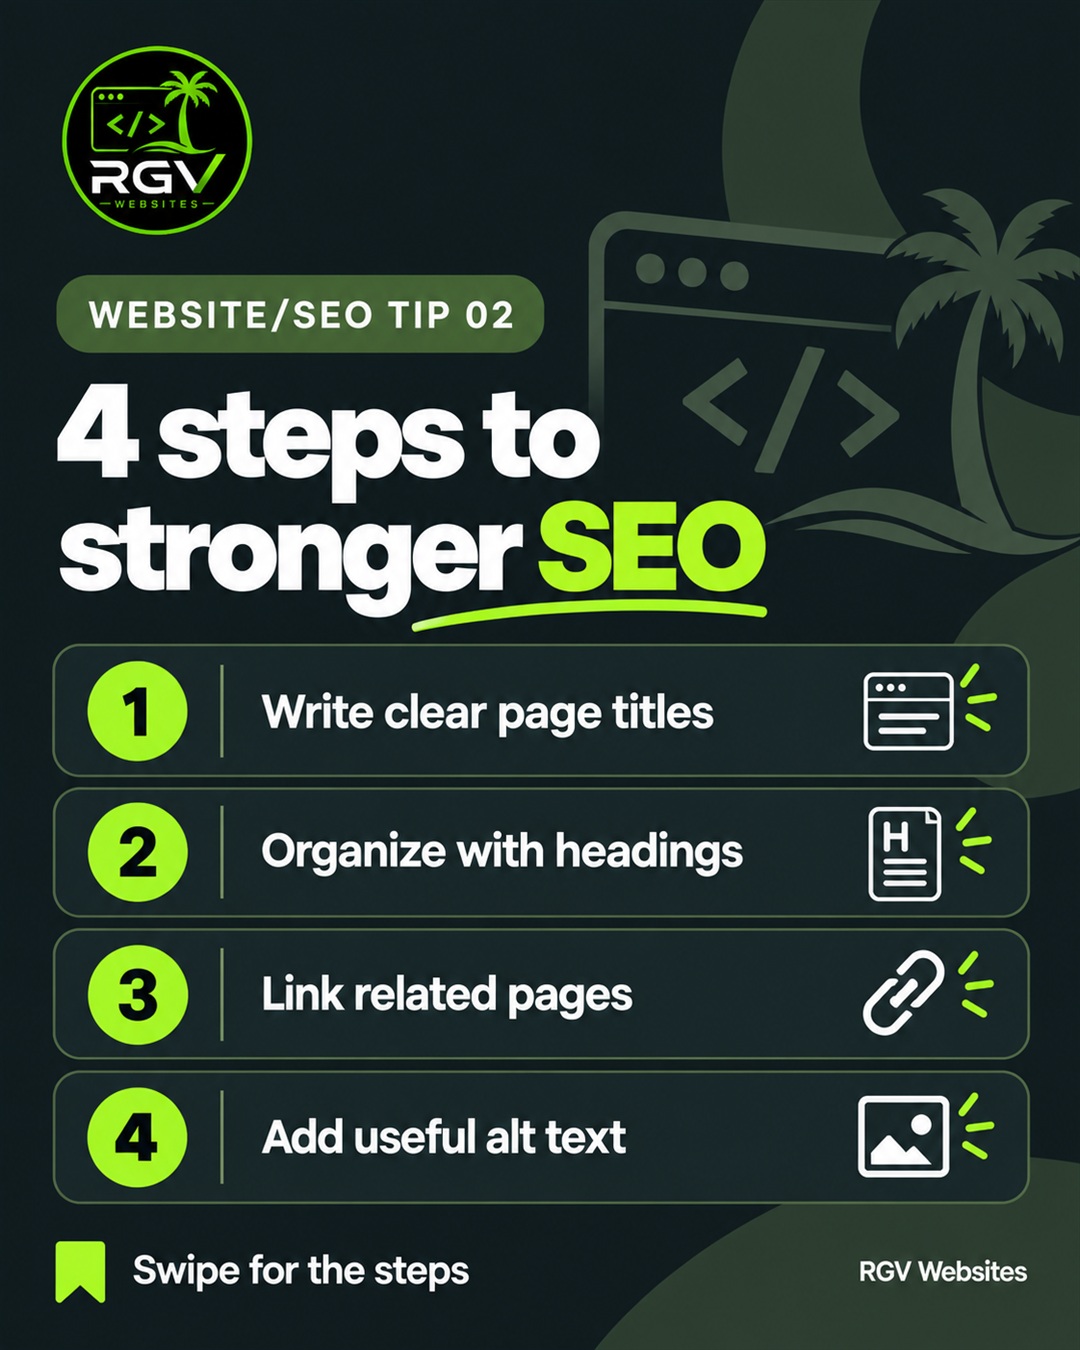
Website/SEO tip 02

4 steps to stronger on-page SEO

Fix the details that tell people, screen readers, and search engines what a page is about. Start with the plain-language lesson, then follow the exact playbook for your website platform.

RGV WebsitesOctober 2, 2026 28 min read
Start with the checklist
RGV Websites checklist showing four SEO steps: clear page titles, organized headings, related-page links, and useful image alt text

Before you edit

Start with one real page.

Do not try to rewrite the whole website at once. Pick a high-value page, complete all four steps, publish it, and verify the live result before moving to the next page.

Choose one public page you are allowed to edit.

Write down the page's one main subject or service.

Copy the page's current public URL before changing anything.

Open the website on a phone and desktop for a before reference.

Know how your platform saves drafts and publishes live changes.

Plan to verify the public page, not only the editor preview.

Write a title that identifies this page.

The HTML <title> appears in the browser tab and is one signal Google can use for the blue title link in search. The visible H1 lives inside the page. Write both around the same subject, but let each do its own job.

Before

Home

Better

Web Design in McAllen, TX | RGV Websites

A useful title answers

  • • What is the page specifically about?
  • • Which service, product, or task does it cover?
  • • Is a city or service area truly relevant?
  • • Which brand owns the page?

Avoid these shortcuts

  • • Reusing the same title across every page.
  • • Listing every city or service in one title.
  • • Writing for a character counter instead of clarity.
  • • Assuming Google must display the exact wording.
Document title and visible main headingHTML
<head>
  <title>Web Design in McAllen, TX | RGV Websites</title>
</head>
<body>
  <main>
    <h1>Web Design for McAllen Businesses</h1>
  </main>
</body>

Smallest-step method

  1. 1Say the page's subject out loud in one sentence: This page helps ___ do ___.
  2. 2Turn that sentence into a concise page title, then add the brand at the end if it helps identify the result.
  3. 3Add one location only when the page's content and service actually support that location.
  4. 4Write a human-facing H1 that confirms the same topic after someone lands on the page.
  5. 5Save, publish, open the live page, and read the browser tab and visible H1 together.

Why Google may show different words

Google creates title links automatically and may use the title element, the visible main heading, prominent text, or link text. A clear title improves the signal; it does not lock the search result. After a change, Google must recrawl and reprocess the page.

Read Google's title-link guidance

Step 02 · Heading structure

Make the page outline understandable without the design.

Headings divide a long page into named sections. They help sighted readers scan, give screen reader users a way to navigate, and make relationships between topics clearer. Treat them as an outline before treating them as typography.

Before

Large bold text used everywhere

Better

One H1, major H2 sections, and H3 subsections

A logical heading outlineHTML
<h1>Web Design for Small Businesses</h1>

<h2>Website design services</h2>
<h3>Service business websites</h3>
<h3>Ecommerce websites</h3>

<h2>How our process works</h2>
<h3>Discovery and planning</h3>

Build the outline in five passes

  1. 1Find the one sentence that names the whole page. Make that the H1 unless the template already outputs the page title as H1.
  2. 2List the major questions a reader needs answered. Turn those section labels into H2 headings.
  3. 3Use H3 only for a topic that belongs inside the H2 immediately above it.
  4. 4Read only the headings. If they do not summarize the page in order, rename or move them.
  5. 5Use CSS, theme styles, or typography controls for size and color; keep the heading level based on structure.
H1

The page's main topic

Usually one clear H1 on a business page.

H2

A major section

Services, process, pricing, FAQs, contact.

H3

A subsection

A specific service inside the Services section.

Step 04 · Image alternatives

Describe the information, not every visible pixel.

Alt text is the text alternative attached to an image. It helps when the image cannot be seen. Write it around what the image contributes in this specific page context.

Before

bakery-bread-final-2.jpg

Better

Baker holding a tray of fresh bread

Informative imageHTML
<img
  src="/images/baker-with-bread.jpg"
  alt="Baker holding a tray of fresh bread"
>
Decorative imageHTML
<img src="/images/green-swoosh.svg" alt="">
Functional linked imageHTML
<a href="/portfolio">
  <img src="/icons/work-grid.svg" alt="View our website portfolio">
</a>

Informative

Describe the useful subject, action, or result in context.

Decorative

Use empty alt text when the image adds no information.

Functional

Describe the action or destination when the image is the control.

Write it in context

  1. 1Temporarily hide the image and ask what useful information is now missing.
  2. 2Write that missing information in a short phrase or sentence.
  3. 3Remove filler such as image of or picture of unless the medium itself matters, such as diagram or map.
  4. 4Do not repeat a nearby sentence word-for-word when it already communicates the same information.
  5. 5If nothing meaningful is missing, mark the image decorative or use an empty alt attribute.

Alt text is not a caption

A caption is visible to everyone and can add context, credit, or commentary. Alt text is an alternative for the image itself. An image can need both, one, or neither depending on its purpose and the surrounding text.

Choose your editor

Follow your platform playbook.

Platform labels can change with editor releases, site versions, themes, apps, and account plans. These paths were checked against the vendors' current documentation. If your screen differs, use the linked official guide and confirm which editor or content type you opened.

Platform playbook

Hand-coded HTML or a framework

Use this path when you can edit the page template, route component, or HTML source and deploy the site yourself.

Back to selector ↑
1

Title

Edit the document head

  1. 1.Open the file or route that controls this exact page. In a plain HTML site, this is usually the page's .html file. In a framework, it may be a route-level metadata or head function.
  2. 2.Find the document <head>. Confirm there is exactly one <title> element for the page.
  3. 3.Replace generic text such as Home with a concise description of this page. Add the location only when the page actually serves that place.
  4. 4.If your framework has a metadata API, use that API instead of manually injecting a second <title> tag.
2

Headings

Build a real document outline

  1. 1.Find the visible main topic inside <main>. Mark it up as the page's H1.
  2. 2.Turn each major section label into an H2. Use an H3 only when it belongs inside the H2 section above it.
  3. 3.Use CSS classes to change font size or appearance. Do not choose H3 merely because its default size looks right.
  4. 4.Read only the headings from top to bottom. They should work like a short table of contents.
3

Links

Connect the next useful page

  1. 1.Choose a page that genuinely helps the reader continue, such as a detailed service, pricing, case study, or contact page.
  2. 2.Wrap descriptive words in an <a> element. Prefer Explore our web design services over Click here.
  3. 3.Use a root-relative URL such as /services/web-design for another page on the same site.
  4. 4.For a jump within the same page, give the destination an id such as id="pricing" and link to #pricing. That is an anchor jump, not a link to a different page.
4

Alt text

Classify the image before writing

  1. 1.Ask whether the reader loses useful information when the image disappears.
  2. 2.For an informative image, write an alt attribute that conveys the useful subject or result in the page's context.
  3. 3.For a decorative flourish, use alt="" so assistive technology can skip it.
  4. 4.For an image that is the only content inside a link or button, describe the destination or action, not just its appearance.

Save, publish, and verify

  • Save the file and run the project's normal local preview or development command.
  • Open the page, inspect the browser tab, and confirm the visible H1 and section headings.
  • Use View Page Source and search for <title>, <h1, href=, and alt=.
  • Run the project's tests/build, deploy through its normal workflow, and repeat the checks on the public URL.

If the screen looks different

  • Two title tags usually mean the framework metadata system and a manual tag are both active.
  • A correct local preview with an old live page usually means the latest build was not deployed or a cache is serving an older version.
  • If the H1 looks wrong, fix its CSS class. Do not change the heading level just to change its size.

Platform playbook

WordPress block editor

These steps apply to the core block editor. Theme templates and SEO plugins can change which controls you see.

The page title field, visible H1, and SEO title are related but separate. Many themes automatically render the page title as the H1.

Back to selector ↑
1

Title

Set the page title, then the SEO title

  1. 1.Sign in to WordPress and open Dashboard → Pages → All Pages.
  2. 2.Find the page and select Edit. The large title field at the top is the WordPress page title. Update it if the visible page name is vague.
  3. 3.Before adding an H1 block, preview the page. If the theme already prints the page title as an H1, keep that single H1 and begin content sections with H2 blocks.
  4. 4.With Yoast SEO installed, open the Yoast SEO sidebar from its icon near the upper-right or scroll to the Yoast SEO meta box. Open Google preview/Search appearance and edit the SEO title for this page.
  5. 5.If you use Rank Math or All in One SEO, open that plugin's snippet editor and look for SEO Title. Do not install a second SEO plugin only to follow these instructions.
  6. 6.Without an SEO plugin, WordPress and the theme usually build the title tag from the page title and site name. Ask the site developer before editing theme files.
2

Headings

Use Heading blocks in order

  1. 1.Place the cursor where a section begins. Choose the + Block Inserter and search Heading, or type /heading and press Enter.
  2. 2.Use the block toolbar to choose H2 for a major section or H3 for a subsection inside an H2.
  3. 3.Open Document Overview near the top-left and review the Outline. Fix skipped levels and repeated main headings.
  4. 4.If a heading needs a different visual size, use the block's Typography or Styles controls instead of changing its semantic level.
3

Links

Search for an internal page

  1. 1.Highlight the words that explain the destination.
  2. 2.Choose the Link icon in the block toolbar or press Ctrl+K on Windows/Command+K on Mac.
  3. 3.Start typing the destination page title, select the correct result, and press Enter.
  4. 4.Open the link preview once more and confirm it points to the intended page, not an attachment or an outdated draft.
4

Alt text

Edit the Image block details

  1. 1.Select the Image block. If the settings sidebar is hidden, choose the Settings icon beside Save/Publish.
  2. 2.Open the block's Content/Settings area or the Media Library details and find Alt Text.
  3. 3.Describe an informative image in context. If the current WordPress version offers Mark as decorative, choose it for a decorative image; otherwise leave its alt text empty.
  4. 4.Use the Caption field only when readers should see explanatory text below the image. A caption does not automatically replace alt text.

Save, publish, and verify

  • Choose Preview → Preview in new tab and review the desktop and mobile layouts.
  • Choose Update for an existing public page or Publish for a new page, then complete WordPress's confirmation panel.
  • Open View Page and check the browser tab, visible heading order, every new link, and each image with a browser accessibility tool or inspector.
  • If the site uses caching, clear the approved site cache and check the public URL in a private window.

If the screen looks different

  • If two H1s appear, the theme may already output the page title. Remove the extra H1 block or adjust the template with developer help.
  • If the SEO title field is missing, confirm which SEO plugin is active. Plugin controls should not be guessed or duplicated.
  • If Update succeeds but the live page is unchanged, check page-builder templates, caching, and whether you edited the correct page or language version.

Platform playbook

Wix Editor

Wix Editor, Wix Studio, and Wix Harmony can use slightly different labels. The SEO basics path is available from the page menu in the current editors.

Back to selector ↑
1

Title

Edit SEO basics for the page

  1. 1.Open the site editor and choose Pages & Menu on the left.
  2. 2.Find the page, choose its More Actions icon, and open SEO basics.
  3. 3.Enter a unique description in Title tag (title in search results). Keep the business location only when the page is truly relevant to that location.
  4. 4.Do not assume this field changes the large text visitors see on the page. Edit that text element separately.
2

Headings

Assign real heading tags to text

  1. 1.Open the relevant page in the editor and select the main text element.
  2. 2.Choose Edit Text and set the main page topic to a Heading 1/title style that outputs H1.
  3. 3.Use Heading 2 for major sections and Heading 3 for subsections. Wix Studio may show these options under the HTML tag or text style controls.
  4. 4.Keep the visual design in the theme/text styling controls instead of turning every large sentence into an H1.
3

Links

Link descriptive text to a Wix page

  1. 1.Select the words or element that should become a link and choose the Link icon.
  2. 2.Choose Page for a page on this Wix site, then select the exact destination. Use Web address only for a complete external URL.
  3. 3.Confirm whether the destination should open in the current window. Internal navigation normally stays in the current window.
  4. 4.Choose Done and preview the page to test the link.
4

Alt text

Describe the image in its settings

  1. 1.Select the image in the editor and choose Settings.
  2. 2.Enter a contextual description under What's in the image? This field supplies the image's alt text.
  3. 3.For a gallery, open Manage Media and edit the alt text for each meaningful image rather than copying one description across the gallery.
  4. 4.For a decorative image, use the editor's decorative option when available or leave the alt description empty according to that component's settings.

Save, publish, and verify

  • Choose Preview and test the page at desktop and mobile breakpoints.
  • Choose Publish in the top-right of the editor.
  • Open the public page from the publish confirmation and confirm the browser tab, heading hierarchy, links, and image alternatives.
  • Search engines update after another crawl; publishing does not force an immediate search-result change.

If the screen looks different

  • If SEO basics is missing, confirm you opened the page's More Actions menu rather than the settings for a text element.
  • A title tag can be correct even when Google displays different wording, because Google can generate a title link from other page signals.
  • Dynamic pages, products, blog posts, and app pages can have their own SEO panels or patterns.

Platform playbook

Squarespace 7.1

Squarespace separates SEO, page, and navigation titles. Collection items such as products and posts have their own settings screens.

Back to selector ↑
1

Title

Set the page-level SEO title

  1. 1.Open the Pages panel, hover over the page, and choose the gear icon.
  2. 2.Open the SEO tab and enter the SEO Title. This is separate from the Navigation Title and the visible Page Title.
  3. 3.Choose Save. For the homepage, use SEO/AI Visibility → SEO Settings and review the homepage title format because the normal page SEO title is not available there.
  4. 4.If the site uses a title format, keep the page variable in that format so the page's SEO title can appear in browser tabs and search results.
2

Headings

Format text blocks semantically

  1. 1.Open the page and choose Edit. Click into the text block that contains the page topic or section title.
  2. 2.Highlight the text and choose Heading 1 for the main topic, Heading 2 for major sections, or Heading 3 for subsections.
  3. 3.Check whether the template already displays a page or collection title as H1 before adding another H1 in a text block.
  4. 4.Choose a different text style in Site Styles if the heading looks wrong; do not flatten the outline just to change the font size.
3

Links

Link text to site content

  1. 1.Click into a text block and highlight descriptive link text.
  2. 2.Choose the Link icon or press Ctrl+K/Command+K.
  3. 3.Select the relevant page or content item on the site. For an external destination, enter the complete URL.
  4. 4.Press Enter or Save in the link editor, then test the linked text while previewing the page.
4

Alt text

Use the image block's Content tab

  1. 1.While editing the page, double-click the image block or select its pencil icon.
  2. 2.Open Content, find Image alt text, and enter the useful description. Squarespace saves image-block alt text automatically.
  3. 3.Auto layouts and gallery sections use different image editors. Open Edit Content, select the individual image, and find Image Alt Text.
  4. 4.Do not rely on the file name or visible caption when a dedicated alt-text field is available.

Save, publish, and verify

  • Choose Save after editing the page, then exit edit mode.
  • Open the public page in a private window and confirm the browser tab and visible headings.
  • Click each internal link and use an accessibility inspector to confirm the image alt values.
  • If the site is in a trial or private mode, the public verification steps may require the appropriate site visibility setting or password.

If the screen looks different

  • If the browser tab ignores the page SEO title, review SEO/AI Visibility → SEO Settings → Search Appearance and confirm the page title variable remains in the format.
  • Page title, navigation title, and SEO title serve different locations; changing one does not always change the others.
  • Alt-text controls vary between image blocks, gallery sections, auto layouts, and collection items, so open the editor for the specific image instance.

Platform playbook

Shopify online store

The steps below focus on a standard Online Store page. Products, collections, and blog posts use similar fields in their own admin records.

Back to selector ↑
1

Title

Edit the page and its search listing

  1. 1.From Shopify admin, open Online Store → Pages and choose the page.
  2. 2.Edit the Title field so it clearly names the page. Depending on the theme, this can also supply the visible H1.
  3. 3.Scroll to Search engine listing and choose Edit website SEO or Edit. Update the page title shown for search without changing the page handle unless you have a redirect plan.
  4. 4.For products, collections, or blog posts, open that item and edit its own Search engine listing instead of the Pages area.
2

Headings

Use the content editor's format menu

  1. 1.In the page Content editor, highlight a section heading.
  2. 2.Use the formatting menu to choose Heading 2 for major sections and Heading 3 for nested subsections.
  3. 3.Preview the theme before adding an H1 in Content. Most themes already render the page Title as the main heading.
  4. 4.If the editor's options cannot produce the needed structure, use the HTML/code view carefully or ask the theme developer; malformed HTML can break the content area.
3

Links

Use a descriptive link title

  1. 1.Enter and highlight the words that should link to the related page.
  2. 2.Choose Insert link, then enter the destination in Link to. An internal page can use a path such as /pages/about or /collections/summer.
  3. 3.Add a descriptive Link title when the editor offers it. This can provide additional accessibility context.
  4. 4.Choose Insert/Apply, then select Save for the page.
4

Alt text

Edit the correct image record

  1. 1.For an image inside the page's rich text, double-click the image to open Edit image.
  2. 2.Enter or revise the image alt text, then choose Edit image to apply it.
  3. 3.For a product image, open Products → the product → the media item, then use Add alt text/Edit alt text in the media preview.
  4. 4.Keep purely decorative theme imagery empty or marked decorative in the theme code. Do not force product keywords into every image description.

Save, publish, and verify

  • Choose Save in Shopify admin.
  • Use View page or Preview to open the storefront version. You may need to reload after saving.
  • Confirm the title in the browser tab, the theme-generated H1, the rich-text heading order, each link, and the alt text.
  • Check both a standard page and any product/collection record you changed; they are stored separately.

If the screen looks different

  • If the page Title appears twice, the theme may output it automatically while the content also contains a manual H1.
  • Changing a page handle changes its URL. Avoid that during a title cleanup unless the old URL will redirect.
  • Theme section images and product media do not share the same alt-text editor as images inserted into rich text.

Platform playbook

Webflow Designer

Static pages use page settings. CMS Collection pages can pull SEO titles and alt text from Collection fields.

Back to selector ↑
1

Title

Open the page's SEO settings

  1. 1.Open the Pages panel and find the static page or Collection template.
  2. 2.Open Page settings, then scroll to SEO settings.
  3. 3.Enter a unique Title tag. For a Collection page, use Add field to build the title from the correct Collection fields.
  4. 4.Keep the page name used inside the Designer separate from the SEO title visitors see in the browser tab.
2

Headings

Set the heading element's HTML tag

  1. 1.Add a Heading element from the Add panel or select an existing heading on the canvas.
  2. 2.Choose H1 for the main page topic, H2 for major sections, and H3 for subsections.
  3. 3.Use classes in the Style panel to control appearance. Multiple headings can share a class while keeping different semantic tags.
  4. 4.Review the Navigator to make sure visual layout wrappers have not separated a subsection from the heading that introduces it.
3

Links

Choose the destination in Element settings

  1. 1.Add or select a Text Link, Button, or Link Block. For rich text, highlight the link words and use the inline link control.
  2. 2.Open Element settings (D). Choose Page and search for the related page, or enter the complete URL for an external link.
  3. 3.For a same-page jump, assign an element ID to the destination and use the Section link option or #id URL.
  4. 4.Keep the linked words descriptive even when the visual design already includes an arrow icon.
4

Alt text

Set asset defaults or one image instance

  1. 1.For an asset-wide default, open Assets (J), hover over the image, and choose the settings cog.
  2. 2.Enter the alt text or choose Decorative. This default follows new instances of that asset.
  3. 3.To override one instance, select the image on the canvas, open Image settings, and choose Custom description or Decorative from Alt text.
  4. 4.For CMS images, add a plain-text alt field to the Collection and connect the image's alt setting to that field.

Save, publish, and verify

  • Use Preview mode to test the visual page and links.
  • Choose Publish, select the intended staging and/or custom domains, and complete the publish action.
  • Open the exact public domain you published and verify the tab title, heading outline, links, and image alternatives.
  • If you edited a Collection template, check more than one Collection item to confirm dynamic fields are populated.

If the screen looks different

  • A change visible on the webflow.io staging domain is not automatically live on the custom domain unless that domain was selected during publishing.
  • Static page SEO settings and Collection template SEO settings are separate.
  • If an image keeps the wrong alt text, check whether the individual instance overrides the Assets-panel default.

Final live-page check

Publish once. Verify twice.

The editor preview is useful, but the public URL is the result customers and crawlers receive. Check it on both a phone and a desktop-sized browser.

  1. 1

    Open the exact public URL

    Use a private window so an editor login or old session does not hide a problem.

  2. 2

    Read the browser tab

    Confirm the title names this page and does not duplicate the brand or show a draft label.

  3. 3

    Scan only the headings

    Find one clear main topic, then major sections and nested subsections in logical order.

  4. 4

    Click every new link

    Confirm each link reaches the intended public page and that same-page anchors land at the right section.

  5. 5

    Check image alternatives

    Use browser developer tools or an accessibility checker to confirm informative, decorative, and functional images are handled correctly.

  6. 6

    Repeat on a phone

    Check that the headings wrap cleanly, linked text is easy to tap, and the content order still makes sense.

  7. 7

    Record the change

    Note the page URL, publish date, and what changed so the result can be reviewed later.

  8. 8

    Allow time for recrawling

    Search results may take time to update and Google can rewrite a title link. Avoid repeatedly changing a clear title every day.

What success looks like

A person can identify the page from the browser tab, understand the page by scanning its headings, move to a related page through meaningful link text, and receive equivalent image information when the image is unavailable. Those are useful improvements even before search performance changes.

Prefer expert help?

Your time belongs in your business. Let us handle the website.

If titles, tags, and website settings are more than you want on your plate, RGV Websites can help you put these improvements into action.

Continue with the other practical RGV Websites guides.
Browse all guides